Mother’s Day Crafts For Kids Decoupage Garden Planter and How We Messed Up
This crafts for kids idea wasn’t a complete Pinterest Fail, because the end result was still pretty cute. But Holy Cow did we (I) mess it up! Let me just say, it was MY fail, Ethan did a great job following directions. My brilliant thinking, wasn’t so brilliant. See, if you let me loose in the craft store, apparently I get a bit ADD and ‘Oh look at all the pretty stuff’ kind of thinking kicks in. Which, resulted in over-thinking what and how to go about making this decoupage garden planter. I thought I was making this craft easier… Turns out, not so much!
So? What went wrong you ask? I totally under-estimated Ethan’s ability to do what should have been a super easy crafts for kids idea. Yep, I made it about 10X harder. On him, on me, on our patience… Fun turned to frustration. Decoupage, is the art of gluing colored paper onto objects to achieve a ‘painted on appearance’. Key words? Colored paper. In my not so genius planning, I thought stickers would be easier for him to work with. I know!!! Parent Fail! Don’t use stickers!!! Let me break it down…
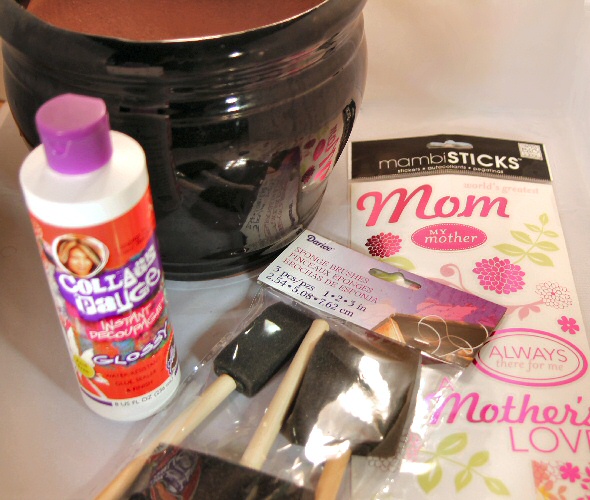
Mother’s Day Crafts For Kids – Decoupage Garden Planter Materials
- Ceramic Garden Planter
- Decoupage (or modge podge, same difference in this case)
- Foam Brushes
- Really pretty colored paper (Do NOT use stickers! Did I say that??)
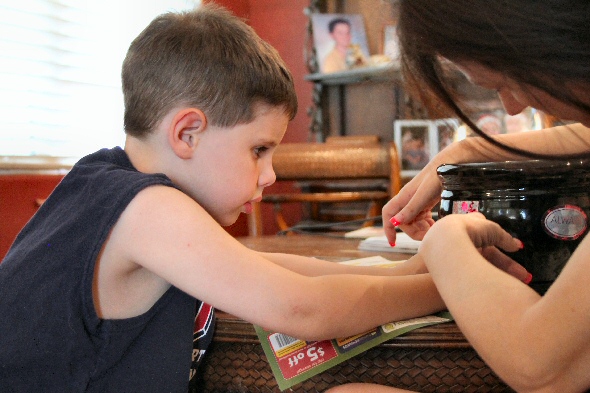
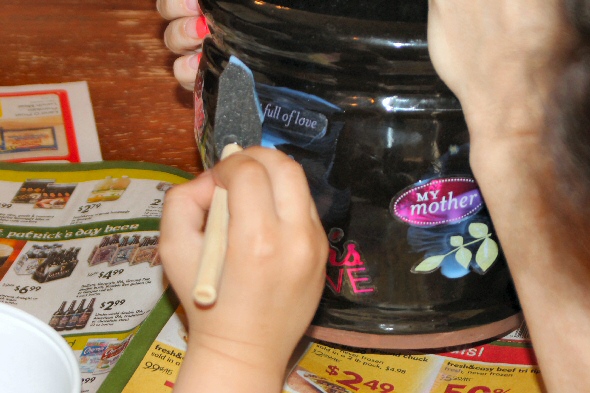
Start by covering your work space with newspaper, decoupage can be messy. Since you did NOT buy stickers and are using colored paper (*hint, do NOT use stickers!) Have a plan in mind of how you want to place your paper prior to starting and make sure the object your placing them on is both clean and dry. Now this is where I would tell you to start gluing your paper to the surface of your art project. Do NOT use stickers! It sounds a lot easier and way less messy to simply ‘stick cute things on‘ but, it’s totally not! Stickers get bubbles under them. You will be rearranging those cute stickers for hours trying to get the bubbles out. Then, they become ‘not so sticky‘… and then everyone gets grouchy! Do NOT use stickers!! Continue gluing all paper to your project’s surface until it’s completely covered and looking extremely cute, just how you envisioned standing in the craft store!
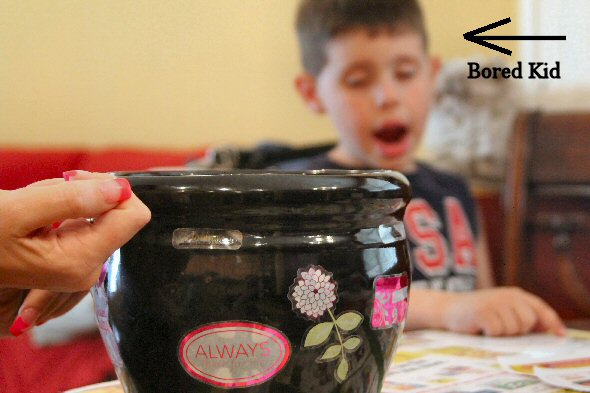
Since you did NOT use stickers, allow glue and paper to completely dry before starting the decoupage. (Why yes, that’s me rearranging stickers to get the bubbles out. It took forever. Half did not even stick! Do NOT use stickers!) If you are using multiple layers of paper to cover your projects surface, allow each layer to dry before starting then next one. This is fun stuff people! You should totally try this easy crafts for kids project. Do NOT use stickers!
Using your foam brush, coat surface with decoupage glaze. Go ahead and allow the small fry to just take over and slop it on. At this point, he’s already bored and ‘painting’ is super fun! Besides, how much worse can this awesome craft (fail) get, right? Just be sure the entire surface is well coated. Since this will be sitting outside you want to be sure the elements won’t ruin all your hard work! Rain would certainly do it! (Especially is you used stickers and those bubbles with the little air pockets get some moisture underneath them. Total nightmare! Do NOT use stickers!)
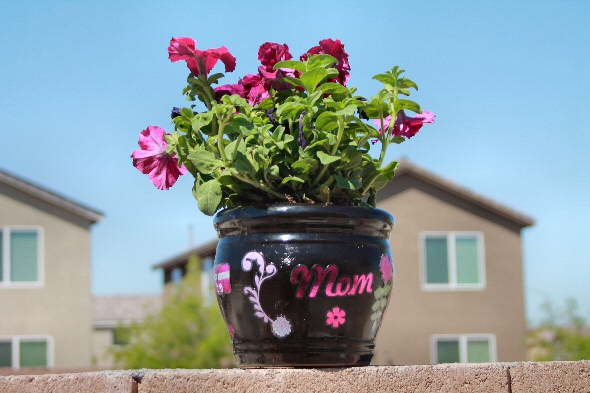
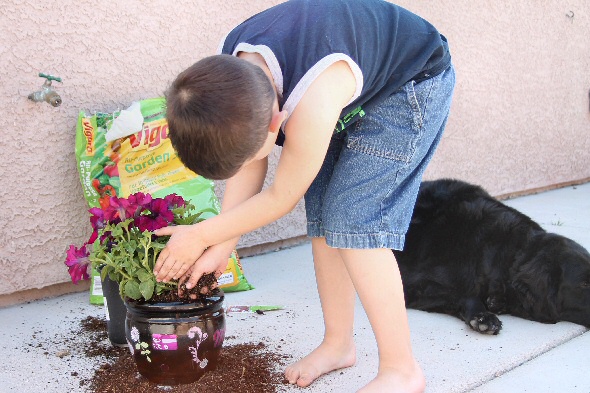
Allow your decoupage to dry over night. And now, you’re ready to fill your Mother’s Day Garden Planter with potting soil and a pretty purple plant. Purple is our favorite color. You can pick a different one. We placed a handful of rocks under the soil for drainage first. Then Ethan had a great time playing in the dirt. Harris the dog was completely bored with the whole process since he couldn’t roll around in it and no tennis balls were involved. But this is a crafts for kids project, not a messy dog project. Can’t make everyone happy. Be sure to water your pretty flowers and set them in the morning sun. Afternoon sun here in Vegas is never good for pretty flowering plants.
Give this Mother’s Day Garden Planter to mom and watch her face light up! Handmade gifts are always the best! It’s all about the thought and love that went int making them, right?
If you’re looking for other cool crafts for kids, check out our Glowing Glitter Wishes In A Jar! This turned out amazing and was a super huge hit! (no stickers necessary!)
If you’re looking for a Teacher Appreciation Gift for your kids to get their craft on with, this one is a winner!

Cute idea! Plus I love how real your blog post is… it’s hilarious how we start crafts for kids and somewhere a long the way it becomes our project. Thanks for the idea!
I think I put in 2 1/2 hours of my own time LOL… Oy
What a fun and creative idea!! Turned out great!!
What a fun and creative idea!! Turned out great!! Hahaha and the post was funny how it turned into your project, I agree with Elma!
Some people are so creative. I don’t know how you get these great ideas and then actually do them.
what a perfect idea and boys tend to look bored during the projects but will be better husbands because of them:) great project idea.
He was not only bored… he kept asking ‘Can I just go outside and play now”…
FUN FUN FUN!!! 😉
I saw this on Pinterest earlier today and fell in LOVE! How cute is that? I can’t wait to have my little ones make this for my mom for Mother’s Day ~ she is going to love it!
Thank you so much for sharing ~ Victoria, DenSchool
Do NOT use stickers! Have fun!! Send pics!
Haha, I loved reading this. You sound like me – I tend to overthink things and make it too complicated. Sometimes the kids do better than me!
I think your end result turned out great!
If I wouldn’t have been standing IN the craft store, getting all dizzy from the ‘pretties’… I might not have been over thinking and just went with the correct directions. He totally would have been fine and perfectly able to do it… It was borderline torture for me LOL
This looks like a fun project. It turned out nicely!
So glad you went ahead with this post! The project turned out great, even though you changed it up a little bit. I do that sometimes to and some fail, some are big hits. It’s what we moms do when we think our kids may not be able to do this or that. They fool us almost every time! Great post.
Elizabeth Rising Early, 31 Days
Thanks Elizabeth!
It did turn out pretty cute in the end!! Getting here, was NOT 1/2 the fun in this case however 🙂
So, what you’re saying is that I should rush out and buy a ton of stickers for this project? Stickers are the way to go? 😀 I got it. No stickers! It still came out cute! The charm in handmade Mother’s Day gifts is that they’re not a perfect storebought-like gift!
EXACTLY!
Rush out, by a ton of stickers and just let them go to town LOL
In the end, he was still proud of himself and that’s really all that counts!! 😉
What a fun project and super cute idea!!
What a great project. Pinned!
That’s very cute! I LOVE that last picture, too!
LOL My poor dog had 0 fun…
That is too funny. I am the mom that would have totally used stickers to make it easier. It turned out cute even with the sticker disaster.
So what kind of stickers should I get at Michael’s ?
JUST KIDDING !! 🙂
Right! So glad to see I’m not the ONLY one (doing the craft that is a gift to myself but) who messes up the kids crafts!
I think your trying to tell me something here…when doing this project should I buy stickers or no??? ROFLMAO
I usually end up with these sorts of fails in the kitchen. FYI evaporated milk and condensed milk are NOT the same thing, and if you make broccoli soup with condensed milk your hubby will eat the whole thing and have heart palpitations, and feel weird for the rest of the night.
Its not ADD in a craft store its ADOS, Attention Deficit OHHHH SHINEY!!!!. I actually named my wedding linen company ADOS Linens b/c I’m so severely afflicted… Thanks for the crafty fun